Friday, December 31, 2010

All you need is love...

Happy New Year to you all!!  I hope you all have something fun planned for tonight.

For my last card of the year I thought I would show you this little tag card I made. My cousin is getting married soon and unfortunately we are unable to attend so I made this as our inability card.

I received these cute Magnolia papers for Christmas (thanks Tanja!!)  and I thought they would be perfect.

 Here is a better pic of "L". The letters are chipboard which I've painted with distress crackle paint "Tattered Rose". All of the edges are sponged with Walmut Stain. This is Heartbreaker Edwin from the Right Through your Heart collection 2010.


 For "O" I've used the Heart with wings.  It is a little difficult to see, but the heart has crackle paint in Rock Candy all over it and Stickles on the wings.


"V" is a tag with Kaisercraft letters to spell out "is all U need"


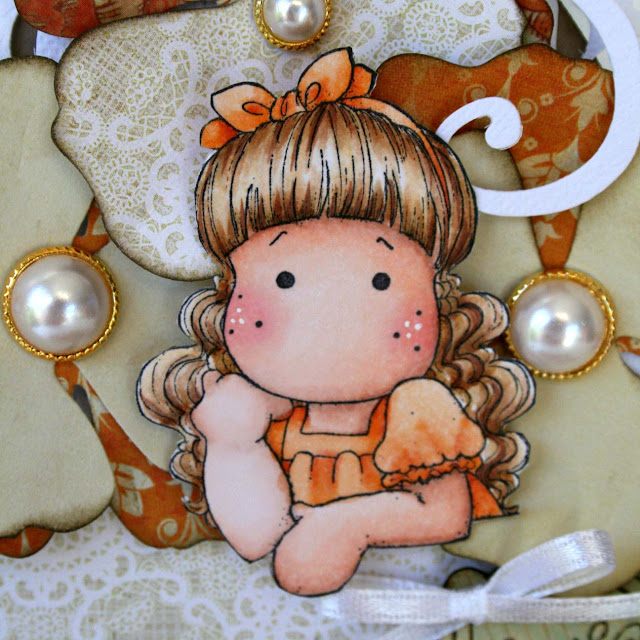
 And "E" is Longing Tilda from the Once Upon a Fairytale collection 2010.

I've used some Doo Hickey dies in embellishing this as well - Tilda's Lace, Old Swedish Lace and Tag.

Ok - have a wonderful New Year celebration what ever you are up to!

Thursday, December 23, 2010

Cuppa Tea anyone?

How are everyone's Christmas preparations going? We finally did our big grocery shop this morning. We thought we'd head out at 8am and beat the crowds... fingers crossed!  And it worked. We were so relieved! We were home again by 9am and able to relax.

I've had this idea to make a tea cup with flowers for a little while now and finally last night I sat down and made it happen. It was inspired by a couple of ideas, firstly, those flower pot cards that were around for a little while and also I was at a garden centre and saw a ceramic pot in the shape of a tea cup with pansies planted in it, so cute!

The card base is simply an easel card and I used a tea cup template I found at Peets Scrapalbum. The flowers are cut with Doo Hickey dies and so is the edge border. I used the "Berry Lace" Doo Hickey but only showed the little dots on the edge.


The flowers and Tilda are attached to a die cut oval which is removable for a message to be written on the back.
 I also used the Doo Hickey Swirl and Leaves on white cardstock The flowers are all edged with "Walnut Stain" distress ink. 


The base of the easel has two pockets built into it. The back one houses a little gift of a tea satchel and the top one has two little tags cut with the Doo Hickey tag die.


Midsummer Tilda is from the Once Upon A Fairy Tale 2010 collection and is coloured with Copic sketch markers.


Magnolia Products used in this card are:

Stamps: Midsummer Tilda - "Once Upon A Fairytale 2010", Tea Label and A Little Yummy for your Tummy sentiment - "A Little Yummy for Your Tummy 2009", Just Sitting Here Thinking of You sentiment "Lazy Summer Days 2009"

Doo Hickey dies: Berry Lace, Tag, Swirl and Leaf, Peony Flowers

Tuesday, December 21, 2010

Tipsy Tilda

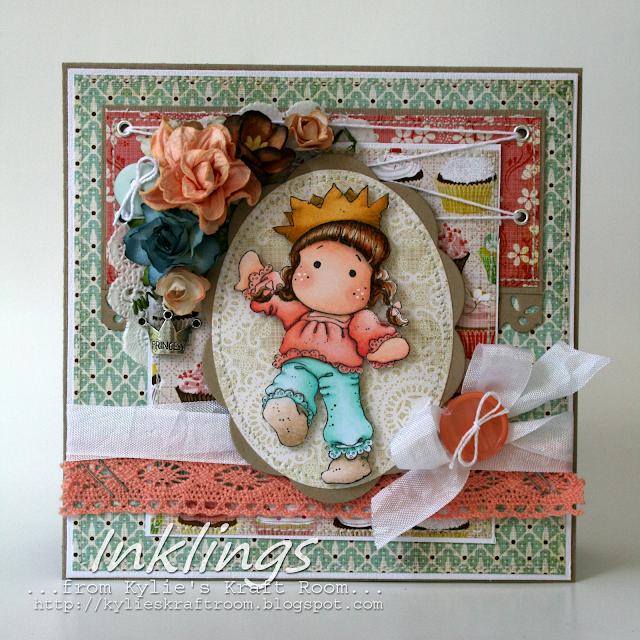
Well.... that's what I'm calling her for the moment anyway, til we find out what she is really called :o) She looks kinda tipsy to me... perfect for New Years, don't you think? It feels a bit strange talking about New Years when Christmas is still 4 days away :)


The great sketch is by Mina and is this week's Just Magnolia challenge.  Its a bit hard to see in the pic but Tilda's crown is sparkly, I coloured it with Spica at You pen in gold and clear.

The papers are from the Basic Grey 6 inch pad "Nook and Pantry" and I managed to find a piece of peach coloured lace in my stash too, what are the odds? And very unlike me... there are a couple of buttons on this card - very unlike me.

Challenge for Tipsy Tilda are:
Just Magnolia #86 - sketch by Mina
All Sorts Challenge #86 - Free and Easy, Anything Goes
Paper Sundaes #49 - Cut it Out
Totally Papercrafts #47 Time to Party
All That Scraps Magnolia Challenge # 5

Merry Christmas everyone!!

Reindeer Tilda

Let me show you my little creation....this is Reindeer Tilda from the Merry Little Christmas 2010 Collection. Isn't she sweet?


I've made a card with a matching gable box for some chocolates. The papers are Basic Grey Jovial.  I've wrapped the ribbon around a circle loop that I cut using Nestabilities Classic Circles. The gable box was cut on my Cricut and the sentiment is also Magnolia from 2008.  Of course the box is filled with little santa chocolates.

White and gold Tilda with Letters

Good morning! Did you all have a great weekend?

I have a little play with this cute little Tilda last night. She is so cute. But I think I say that about all Tilda's, lol. The challenge this week at Just Magnolia is "White plus one" so I have chosen gold, I thought it would look lovely and elegant. And while I was working on this card, I saw the new Totally Tilda challenge pop up in my browser to... Glitz and Gold - how lucky was that? LOL.


The papers are all from the DCWV "Linen Closet" stack. I just love the glittery piece behind Tilda, so beautiful. The gold cardstock is left over from my wedding invitations, haha, yep, I save everything, and somehow even back then, I knew I'd use it down the track :) I gathered some white organza ribbon on my sewing machine and used my nesties to create a little circle for Tilda to sit in. The snowflakes are a Magnolia Doo Hickey die.

Happy Birthday, Love from Tilda

Good morning everyone! I was very lucky and received my Magnolia Winter Club package on Wednesday... wooohooo!!! I couldn't wait to get started and grabbed the EZ mount and got cracking!

I am not sure what this little sweetie is called, but she is just gorgeous! I coloured the image up before choosing papers or thinking about a layout, lol, not something that I normally do...but I was lucky and found some scraps of this beautiful Prima "Flights of Fancy" paper, I just love it!

I used my Magnolia Doo Hickey border die "Tilda's lace" for the edge of the card and coloured the image with Copics.


I coloured the balloon a second time and popped it up on mounting tape. It is covered in Spica At You pen in Clear... although it doesnt show in the photo. The little stars on the border are also a stamp from the Winter club kit and I've stamped them in "Antique Linen" distress ink.


A Christmas gift from the Heart

Hi everyone! Well... here it is, my very last Christmas card with a Magnolia stamp... I think... :o)  I have a couple more Christmas cards on the way, but I am fairly sure this is the last Magnolia one.

It is time for Magnolia Down Under Challenges #76 today... and the challenge this week is Red, Chocolate and Cream.... perfect for Christmas cards or any other occasion really! I chose to make a card and matching gift wrap for a little pressie for a great friend :o) She hasn't received this yet... lol, so it is a little bit of a sneak peak and I'm not going to name any names, hehehe.

This is my last Christmas Maggie to be inked up. She is Jolly Tilda and she is sitting on the little fireplace from the 2009 Christmas collection. The papers are a little bit of a mix.. they are Basic Grey Archaic, Cloud 9 Design Fleur and SU. All of the images are coloured with Copics and the edges of all of the papers are inked with Distress Ink Vintage Photo. The panel that Tilda is sitting on is embossed with a Craft Concepts folder called Venus.  The pretty chocolate lace is Websters trims.


Here is a little close up. She is such a cutie! She looks like she is keeping a secret :)  The holly leaves are cut using my Whiff of Joy die. The swirl is cut using the Magnolia Doo Hickey swirl die.


The gift is in a lovely box as part of its packaging, but the sleeve around the box was pretty boring and daggy, so I removed that and made a new sleeve from cardstock and covered it in patterned paper and a belly belt and a big bow. I've stamps and colours the little bauble images that came in the Christmas Stamp Club from Magnolia and then popped them on foam tape and given them a coat of Crystal effects to make them shiny.


Both the card and the box have been generously sprayed in Iridescent Gold Glimmer mist. I love that stuff! But gosh, it smells a bit when its wet! It was a bit hard to photograph but I was determined!


The challenge will run until Midday Saturday so if you have some time to craft, please check out our little challenge. The DT have come up with some amazing creations.

I lost count - how many Chrissy cards do I need?

How is everyone going? Well I hope!  Oh...its Thursday already, gosh the weeks just fly when Christmas is looming.. and I have so much still to do...like almost all ofmy Christmas shopping! eeek! Its a bit too late to do it online to, lol.

If you saw my WOYWW post yesterday you would have seen that I was in the midst of making a card and had bits and pieces all over my desk and that I mentioned that it was possible that the whole thing could very well end up in the rubbish bin? Well I am happy to say that despite a massive heat embossing disaster the card survived and I have it here to show you now.

After enjoying my gold embossing attempt last week I thought I would give it another go with some American Crafts "Zing" embossing powder that I have been hoarding in my drawer for some time.... well it has been put back safely in the drawer never to surface again! It is silver embossing powder with glitter through it, but instead of the result being nice and luxurious, it was thin and flat and uneven. Terrible. I did keep the sentiment panel that I embossed so you can see that further down the post...

Oh - and a little warning... I went a tad photo mad because the card has a number of opening bits so I wanted to make sure I had a pic of each of them.

So here is the front...the papers are Bo Bunny Midnight Frost. I have little Edwin sitting on his little gate panel with his pressie. The edge is punched with a MS border punch "Swirling Lace".


And here is the front panel with the gate section opened and a little close up of Edwin. Its a little hard to see in the photo on the left, but I've cut a large snowflake frmo acetate on the Cricut and covered it with glitter. It is really sparkly IRL. The trees are Winter Forrest from the Santa 2008 collection. They've also been given a large dose of glitter :)


 This is the inside with the top flap up. I've used Tilda with Christmas Stockings from the Winter 2008 collection.  The swirls on the paper have been glittered and there is another acetate snowflake behind Tilda.


Finally, the last two photos... the left photo is the embossed Merry Christmas sentiment. I'm definately adding some new silver embossing powder to my Christmas list, lol. The photo on the right shows the last panel which has a pocket folded into it to put a note and a gift card or in my case, some tea satchels.
 

There is a great tutorial for this card HERE if you want to have a go yourself. I altered the size of my card to be 6 inches tall x 5.5 inches wide.

A gift for You

Gosh - it is almost Christmas - less than a week to go! Do you have all of your shopping done? My husband and I went out this week while my Mum looked after the kids and we got everything done is two hours - by were we surprised.  All that is left is the food shopping.. but I haven't started thinking about what we will be eating yet. It is the first year ever that we will be spending the day at our own home - OMGoodness - it feels wonderful. The boys will be able to open their pressies from Santa and enjoy them without being rushed around. And I will be able to make Christmas dinner - a first for me! Really!

Anyway, on to my card :) It is the last challenge of the year at Magnolia Down Under Challenges and the theme this week is "A Gift for You". The challenge will run for three weeks instead of one, so the Design Team can have a little break. We will be back with some more fun challenges for you in the New Year, so keep your eyes open for January 9th.

I've used this cute little Tilda from the Winter Kit I received in the mail this week. I *think* the collection is called "You are So Special Collection 2011". I just love the cute stamps that have been release in this stamp club and I can't wait for the pre-orders to see what else is coming out.

I wanted to do something a little bit different so I used my Cricut and cut out a elongated label shape and scored it in half to create this cute little shape. I wanted Tilda to look like she was leaning out of the circle. All the edges are distressed and I made this cute little box to go with the card. My husband said it looks like a boat... well.. It wasn't supposed to!


Tilda was such a joy to colour. Really quick!


And because the card was a bit fancy in shape, I left the layout fairly simple on the outside, but thought it would be fun to jazz up the inside a bit :)


So you can see I've finally discovered my stapler! It is just fantastic for securing those bits of lace in place when you are making a card a bit on the distressed side.

And finally the back of the card.

Monday, December 20, 2010

Silent Night

Ohh - its the weekend! Yay! I hope you have something fun planned... we're putting our Christmas tree up later today. We usually try to follow a bit of a tradition, we put on the Bridget Jones movie (lol, yeah, I know, daggy huh?) and spend the afternoon decorating the tree. It is usually a bit of a laugh as our tree is 7 feet tall.. and well, I am not! hahaha. Nowhere near it! So I am assigned the lower half of the tree. My boys have discovered the joys of unwrapping presents - it is soooo cute! So there will be none under our tree until some time very late on Christmas Eve!

Anyway, onto my card!  I have been waiting for my Tilda with Violin stamp to arrive...and she did yesterday! I actually bought the stamp because I remember my mum loving it when she saw it a few months back on another blog when they were released to some stores early. So Mum - this is your Christmas card, lol.

I inked her up asap and made into a card as quick as I could. I actually stamped her in Memento Rich Cocoa for a change to give her a bit more of a vintage look. I think she turned out ok?  I then masked her and stamped the Silent Night background in versa mark and heat embossed that with gold powder. Heat embossing isn't something I do too often... I usually botch it up! But I managed to do ok this time....it went so well I decided to emboss the edges of my bottom layer of dp as well, hahaha. that didnt go so well, so the messy bits are covered in other layers.


I added crystal effect to Tilda's violin - so shiny! And stickles Diamond to her wings and dress. I'm not sure how well it shows in the photo, but the ribbon has gold flecks on it and the swirls are gold cardstock. I actually really love the card...so maybe I won't give it away...we'll see :)


And side on you can see the gorgeous gold ! So pretty for Christmas!

Tilda in white for Just Magnolia

Hi everyone, I hope you all had lovely weekends. We had a bit of a busy one in the garden (yup, it is spring here in Australia), coupled with my youngest (16 months) cutting four teeth at once.. poor little man.  He was a bit miserable.

I somehow managed to find a bit of spare time to fit in this card through. I'd been admiring the gorgeous white on white creations around blogland and I've never been able to master it... so I was determined to have another go and this beautiful Star Tilda was perfect!


I used my Cuttlebug embossing folder Snowflakes for the background paper and hid the joint with the lace and ribbon. I used a Cuttlebug die for the snowflakes and Nestabilities Labels 10 and Classic Ovals.  The edges are coated in Stickles Diamond and I've added Kaisercraft blue pearls. The little leaf is a Whiff of Joy die.


For the Copic fanatics:
I had a pack of "Bee Paper" sitting on my paper rack from earlier this year. I bought it as it was recommended by Angie to use for Copics and watercolouring, but as I was a newbie to Copics back then, I really did not like it much and so the pack was sitting gathering dust. Having coloured a couple hundred images since then, lol, I thought I'd give it another try.... and this is the result...
Yes - it is lovely paper and I did achieve a good result (well, I think so anyway!). It is very different from Xpress It Blending Card though. It is very light weight (89lb v's the 92lb of the Xpress It). It does not bleed. It does take a little extra effort to blend so I recommend "flicking" to drag the ink on the paper rather than the little circles that we are usually told to do (which I have to say I very rarely do these days). Due to this it is a little more difficult with the darker colours, but these pale pastels it worked quite well. I also had a go of "tip to tip" blending on the Bee Paper (Tilda's sleeves and headband) and it worked beautifully. The paper has a lovely smooth finish to it, unlike the Xpress It which you can sometimes see fibres on the surface. The ink does show through on the reverse though, just like the Xpress It.

And if you are going to use alternative papers, test the colour of your markers on it first to ensure you are going to achieve the colour you want as all papers show colours differently!

A Summery card :)

Happy Sunday to you all! The next challenge is up over at Magnolia Down Under... and this week our challenge may be a little bit out of season for all of you  in the Northern Hemisphere....but not for us Down Under! The challenge this week is.... Summer!! LOL - put those snowflakes away for a break and get out your summer themed stamps!

I thought I'd make a card that opened out.. I'm not sure if there is a special name for it, but it is a bit like a sideways gatefold. I used the very summery ice cream image on the front of the card and on the inside I have Happy Tilda from the Right Through My Heart collection. I've had this MME "Bloom and Grow" paper in my stash for some months now and I pull it out all the time, admire how gorgeous it is and then carefully put it back in the rack, lol. So I thought it was time to actually cut into it... OMG! Such a gorgeous colour combo.  And I had to use a pretty lace doily as well, I thought it suited the ice cream feel. I used my EK Success Binder edge punch on the main image matt, both outside and inside, and also the MS Double Scallop edge punch on the bottom edge of the top flappy bit.


And here is the inside of the card...


Lovely Tilda

Wow - Friday again! I've had a bit of a slow crafting week this week, thank goodness I was organised last week and got a lot of my crafting done that had to be posted this week.

This card I've been working on for a few days in bits and pieces. There is a new challenge for Magnolia-licious and their first challenge the colour combo of Pink and Yellow, so when I saw that I had to play along. These colours aren't a combo I use very often, if at all, but I am really pleased with how these colours come together as pastels. But of course, a little bit of kraft cardstock and white lace goes a long way to balance it all out.


I had this gorgeous little stamp "Lovely Tilda" from the Fall collection just sitting waiting for some attention. She was one of those "must haves" that I first saw in the Fall Magnolia Ink and then she didn't see ink until now. I do that a lot, lol. The paper I used was just perfect for this challenge. It is Pink Paislee "Sweetness" petite paper pad. But that is where my creative flow stopped! I knew I wanted the paper to be scene but I couldn't work out a sketch without covering them up... until I was talking to a friend today and was reminded of the circle doily die... another of those "must have" items that I just haven't bothered to try out. I bought this die on pre order, as I am sure most of you did, thinking that it was a full circle only to be a bit surprised to receive half a die in the mail. So it has been sitting in that too hard pile waiting for me to gather my patience to give it a go. And Yes... I was pleasantly surprised that I was able to match up the pattern without too much of a hassle. Gotta love scotch tape. Anyway, back to the paper, lol, I decided to use my craft knife and carefully cut around the gorgeous flowers to tuck the doily in underneath. There is also a Magnolia doo hickey tag sticking out the top right side under the flowers. Add a lace doily, a generous amount of stickes and voila!

Pink Elephant for Ruby

I made my card for my friend's little girl's first birthday. I thought that the cute Magnolia Elephant would look really sweet masked and paper toled for a little girl's birthday card.


It is a little thick with all of the layers of cardstock, lol. I should have thought about that and made some gussets in the sides! But here is a better view of the paper tole. I also added the little tulip in the elephant's trunk for a fun touch.


And this is the inside. In hindsight I wish I hadn't sponged the edges. It looks a little bit dirty. Oh well! Live and learn.

Challenges:
Sweet Stampin #44 - Stitching
Totally Papercrafts - Happy Birthday!
Fun with Shapes - Lace
Just Magnolia - Lace it Up
Ingredients for this card are:
Copic colours: RV 11, 10, 000, YR 65, 61, 000, YG 67, 63, G99
Stamps: Magnolia: Elephant (Pets and Animals Collection 2009), Tulip Grass; Kaisercraft sentiment
Papers: Sassafras Lass - Life is Beautiful "Fawnd of you too", SU cardstock, Pumpkin Pie, So Saffron, Rose Red
Embellishments: Prima Hydrangeas, Brads, Ribbon, Stickles Diamond, Lace
Other: Tim Holtz distress tool and sewing machine

Tilda getting ready for Summer

I was rummaging through my stamps and found this little Tilda and her bathing ring just sitting there waiting to be inked up.... and bing! Light bulb moment - my new Whiff of Joy Pennant die from was going to be perfect for this card.
The card is a bit brighter than my usual card, but I quite liked the result. I must remember to use yellows a little bit more.

Tilda's wishing well

I am very lucky and have been asked to be a guest for Make It Crafty for their 3D challenge starting on the 10th. Zoe very generously supplied me with her Wishing Well kit to play with and wow - it was heaps of fun.

When the kit arrived I was a little... apprehensive :) There were a lot of pieces, lol. And I have to admit, I am a bit of a novice when it comes to assembling kits so I thought I'd be good and actually read the instructions prior to assembling the kit. Much to my relief, all the parts were very clearly labelled and the instuctions very easy to follow. Would I make another one? Oh you bet! I loved it. And - for those of you who enjoy kits that work - the handle cranks and the bucket moves up and down - how totally awesome is that? LOL, I have to say I was a bit relieved when I'd assembled mine that the bucket actually DID work as it should.

I decorated my Wishing Well with some Magnolia images, and Zoe very cleverly designed the Wishing Well exactly the perfect size for Tilda.
I painted mine in Distress Crackle paint "Picket Fence", then gave it a light sponge in "Antique Linen" to grunge it up a little. I filled the little bucket with flowers and glued them in with the hot glue gun.


I'm dreaming of a PINK Christmas

I cut into my beautiful Websters Pages minis "Sweet Season" christmas papers (I know, I know... it was really difficult!) and got out my doo hickeys. I used ______ Tilda and the Candycane accessory. Tilda actually was holding a present behind her... but I cut it off and put the candycane in there instead. I think she looks cute :)  I coloured her in Copics on Bee Paper and then did some (dodgy) watercolouring for the shaddows in Walnut Stain distress ink.


I followed a cute tutorial for ribbon scrunching (the cream 6mm ribbon) which you can find HERE, and added some lace and inked the edges of all paper and cardstock. The tag and sentiment are SU! and the little gold resin Christmas tree is from my local craft store. I think it was intended for gift wrapping, but hey, it works here too :) Oh, and of course, a little gold bell for good measure!

A happy card for a sad goodbye

I have a really bright happy card to share with you today. It is however, a bit sad too. This card is my last DT card for Creatalicious Challenges. Creatalicious was my first ever DT assignment and I will always be grateful to Bec and Cheryl for asking me to come and join them for six months, which turned out to be eight months, lol. So a big thanks to Bec and Cheryl and best of luck for the future to the entire DT. They have been wonderful to work with.

Now... the challenge! This month is a colour challenge - PINK, GREEN and BROWN. And I have to say, I do use these colours frequently... but I had so much trouble coming up with something. I guess I wanted to have something really pretty for my last card.

Then my I Can Fly Tilda stamp arrived in my mail box and the Dawny's Just Magnolia sketch appeared and it all fell into place.